The purpose of this blog is to chronicle the restoration of my 1934 Stoner Super-8 pinball machine.

Please note* You will find the oldest post is at the bottom, newest at the top...

Tuesday, March 4, 2014

Super-8 Tournament

This is an interesting article sent to me by Rob Hawkins of http://www.pinballcollectorsresource.com/

The Super-8 was chosen for use in a pinball tournament in October of 1934 where the top two winners received Philco radios for their prize.  If you open the image in a new window you can see a larger version.

Super-8 Tournament.  Click to enlarge

Friday, February 28, 2014

The Final Pieces

Just a quick update of where I am.  I am pretty much complete with just a few final pieces to take care of. 

I have my power working correctly.  I was able to run the charger at 12 volts and 6 amps which gave me pretty much the perfect amount of power.

I have my glass in and no issues of balls popping out of line anymore as well as the noise level is now normal. 

The game is much harder than the Signal to get the skill shots.  I was thinking with 3 options you could hit them a lot but it is harder than I expected which is fun. 

Last things needed are:

- Super-8 card
- Having the lock for the door keyed or lock replaced
- Tilt pedestal replaced
- Paint the new knobs which I cannot do until spring

Here are a couple of pictures of how it looks now.


Monday, February 17, 2014

Working out the kinks

I am in the process of working out the last few kinks. I rewired the machine as all the wires were cracked.  I have tested it with the battery charger from the Signal to make sure it works properly before ordering one for this machine. It works but there were a few issues.

There was an issue with the armature in the left channel solenoid where after popping out it would not slide back in.  It was a little gunky so I cleaned it and hopefully it does the trick. I ordered a battery charger to run the machine and it arrived but was damaged so now waiting on the new one which should be here tomorrow.

I do have a little issue with the power and will need to see how it goes once I get the glass.  The issue is this. If a ball is in one of the channels it is propelled to the next position when a ball is dropped into either it's matching channel hole or the Super Hole which propels balls in both channels forward.  If it  is just one channel being activated the charger set at 6 volts works fine but when the Super Hole is hit, the 6 volts seemed to be not enough.  If I set it on 12 volts though it is so powerful it propels the balls so hard they fly out of the channels. I am hoping it is a simple as the glass keeping everything contained.  I am concerned though that the balls will be popped up and even though the glass will contain them, that it will cause the balls to land back in the same channel and not get propped to the next. Once I have the glass I will know for sure.

Another issue is that the metal around the ball track that now has a brushed look is extremely loud as the ball rolls around it. I am assuming because it is brushed and so not entirely smooth. I waxed it tonight and will see if that helps.

In the home stretch....

Thursday, February 13, 2014

The Magic Button

The Super-8 has a feature dubbed the Magic Button.  I am not sure why they advertised it as such as it is not a button at all but maybe it is magical... :)

This is how the feature works. 

If you are having a really good game and you have used up all your balls and most are in high scoring holes but a few landed in the bottom where they all are valued at 100 each (there are no zero spots), you can push in a rod (the magic button/rod) under the coin slide before entering another coin and it will only return the balls in lower 100 spot and leave the rest on the playfield so you can continue your game.

The way it works is this. Under the playfield there is the shutter which when pushed forward by the coin slide returns all balls other than the ones in the lower 100. At the same time the slide pushes on a metal piece under the 100 hole which swings towards the front of the machine and drops any balls held there.  

Under the shutter there is a metal piece that when the slide is pushed in, it pushes the metal piece forward and moves the shutter towards the back of the machine as normal.  The metal piece under the shutter is hinged however so when the magic button rod is pushed in, it tilts the metal piece back and up so that when the slide is pushed in it goes under it and thus only releasing the bottom 100 hole captive balls. 

In the attached pictures you can see the hinged part under the shutter and the metal piece under the 100 hole. 

Hinged piece attached to the shutter. When lifted the coin slide cannot push it.

100 hole ball return piece


The machine was missing the magic button rod so had to make one out of 1/4" steel rod.  I needed knobs both for it as well as the ball loader rod as it was missing.  I could not find plastic ones to match the one on the plunger so used wooden ones which are very close in shape and will paint them black when it is warmer out.  To prevent the magic button rod from being pulled all the way out, I drilled a 1/4" hole in a superball and slipped it on.  It is snug enough to keep the rod from being pulled out but can be slid off if I need to take the rod out.

Where the rod pushes on the hinged part under the shutter.

New magic button rod and knob


New knobs


The knobs do look kind of like mushrooms, maybe that is where they came up with the name magic button....


Wednesday, February 12, 2014

P is for Pigpen

So I have been busy getting the machine as clean as possible and am nearly done.  I have a few things to still order but mostly there. 

One of the issues I had was the coin slide was so dirty that to push a coin through was nearly impossible.  I felt I was actually going to break the slide doing it.  So I disassembled it and I think that the P carved in the front was done by none other than Pigpen himself.  When taking it apart there were piles of dirt, not sure a film of dirt.  I was shocked it was that bad. 

 Here is what it looked like prior to cleaning it.


Si after taking it apart I cleaned it all with Simple green and then I sprayed it out with carb cleaner and then again withe Simple green.  After cleaning it moves freely and accepts coins the way it was meant to.  It did not spring back like the one on my Signal and realized that it is missing one of the two springs it needs and the one that is there is hooked up incorrectly.  I will search for a spring later today.  I also discovered why I have an issue with the slide on my Signal.  The Signal has an issue where the coins after being pushed through just sit on the slide and on occasion when the slide comes back out the coin jams as it gets pulled back in.  It winds up there is a piece that was removed from the slide that holds the coin when the slide is pulled back out.  As more coins are inserted, it pushed the coins down a small track which directs them into the coin box below.  I have started to look to see if a replacement part from a damaged slide is available but at this point, no.  So for now I have disabled the feelers on the Signal's coin slide that check for coins which allows the slide to be pushed in with no coin.  If I find the part, I will set it back to accept coins.

This is after pictures of the slide as well as a picture of the missing part from the other slide.


More to come....

Monday, February 10, 2014

The missing pieces

I have been busy figuring out what I needed to replace either because it is damaged or missing.  I have searched and purchased a few items locally and the rest I have had to purchase online. 

Plunger tip - the original was missing and the end of the plunger was pretty dinged up.  I believe that when it went missing, the game was still used and damaged the end.  I was able to grind down the end to fix the mushrooming that occurred and purchased tips meant for a new plunger.  It did not fit perfectly and was loose.  I wrapped a small piece of electrical tape around the end of the rod before slipping on the tip and it seems to have done the trick.  It is a little different material than it would have originally been used but it will do the trick.  Source: ebay.com

Various screws and bolts - the machine was missing several screws and bolts.  I could not find what I needed locally as all that is left really are the two big boys in the hardware game and they both have limited sizing.  So I looked online and found a few options.  Source: boltdepot.com

Magic Button rod -  the game has a feature dubbed "the Magic Button" which is a rod that when pushed in lets you insert a coin that returns only the balls in the lowest scoring hole and keep your game going.  The rod was missing on my game.  My two options I found were aluminum rod and steel.  I went with aluminum first thinking, no rust.  The moment I got in the car and headed home I realized I made a mistake.  Although it won't rust, it won't look right being a brushed aluminum rod.  I returned and purchased a 1/4" diameter steel rod.  I will polish and cut to size.  I need to figure a way to keep it from being pulled completely out of the machine.  Source: Lowes

Knobs - the knob for the ball loader is missing and I needed a new nob for the Magic Button rod as well.  I looked for plastic knobs online but could not find what I needed.  Also most knobs have a smaller diameter hole.  I wound up going with wood knobs that look very much like the one on the shooter and will paint them black to match.  I will try satin first and if not shiny enough will move up to semi-gloss.  I do not think I can get it to match perfect but pretty close.  Source: Lowes

Leg bolts - luckily the legs were with the machine when I purchased it but the leg bolts were missing.  There was 1 rusty beat up one inside the game but it is no good.  I am doing the same thing I did with the Signal.  I purchased steel allthread rod and nickel plated acorn nuts and will cut the rod to length and glue the acorn nuts to one end to make my own bolts.  I was going to cut them yesterday but unfortunately I cannot get into my shed due to ice that is built up and completely blocked the door.  Rather than kill myself hacking the ice out or waiting for it to thaw, I will go and buy a new cheap hacksaw on the way home today.  Source: Lowes (allthread rod), Acorn nuts and washers (amazon.com).

Playfield springs - there are 2 playfield springs that need to be replaced on the machine.  One was damaged and one along with it's nail were missing.  I started looking into replacements and was striking out.  Michael Schiess from the Pacific Pinball Museum reached out to me after seeing my posts looking for replacements and believes he has something that will work in a box of springs that he had purchased and is sending them to me.  The Pacific Pinball Museum is a non profit organization that is working hard to preserve and promote the game of pinball.  You can read more about them here  Source: Pacific Pinball Museum

Playfield glass - the glass was missing when I got the game and that is why the machine was a dirty as it was.  I still need to measure and order, hopefully will do that tomorrow.  Source: TBD

 Power - the machine was originally built to run on batteries but at some point was powered by AC as there were two old transformers inside the machine.  One very old one from a doorbell and one train transformer from the 1970s.  Both have cracked wires and are not trustworthy.  I need to find a new transformer.  Source: TBD

More to come....


Friday, January 31, 2014

1031

Today I cleaned the cabinet and have given it a coat of wax.  Luckily it does not need as many coats as the playfield because it is harder to buff out as there are wooden trim pieces that make it more time consuming and difficult.

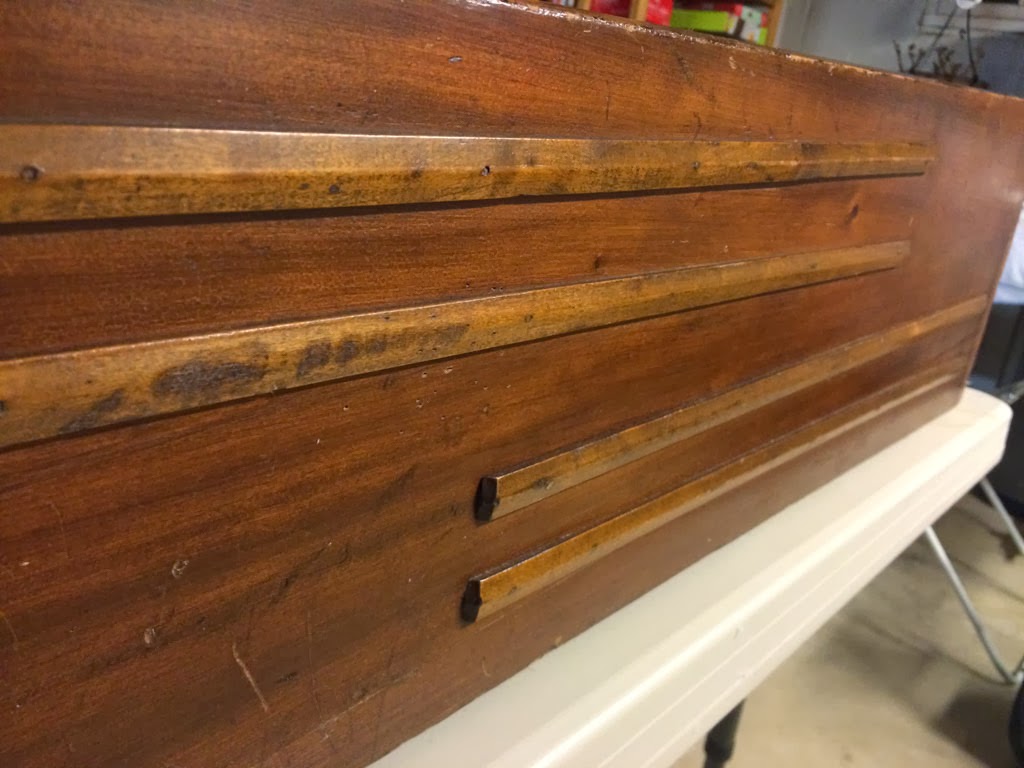
The cabinet as you can see was extremely dirty.  There was white paint that had been splattered on the right side.  On the left side there was silver paint overspray.  I started out by cleaning the whole cabinet with mineral spirits to remove any grease, wax or polish.  I followed it with 50/50 water and Simple Green and then took super fine steel wool and buffed out the paint and got 99% of it off.  There were a few spots where the white was in a few cracks and was unable to get it out but luckily most was removed.  Then I finished by giving a coat of wax.  I will do one more tomorrow and should be done with the cabinet.

I found a couple interesting things when cleaning.  Among the dings and scratches and cigarette burns I found that somebody carved a P into the front of the cabinet when it was once on location.  The other thing I found was the serial number.  When I restored the Signal I searched all over the machine but could not find one or at least not sure if I did.  I found lots of numbers written in pencil on the inside of the cabinet and found the same with this machine.  But today when cleaning it I found the serial number stamped into the front of the cabinet below the coin slide.

Right side with white paint

You can see what it looked like originally where the plunger was removed.

Silver paint overspray on left side


Front after cleaning.

No more silver paint

No more white paint


A vandals handy work

Super 8 number 1031

Wednesday, January 29, 2014

Arnold would be proud

When I purchased the machine I thought for sure I was going to have to refinish the playfield.  It was very warn and dry.  The Signal, even though was dirty and in need of some cleaning looked sooooo much better than this machine did.

I started out by trying to clean it.   I first tried using Murphy's Oil Soap Citrus which is what I used on the Signal and right away I started to lose a little paint from the Super-8 logo and stopped right away.  I started to look into what cleaners I could use and also for what to use to clear it with.  Pretty much everybody said they would not recommend clearing it and instead just wax it with paste wax which is what I had done on the Signal.  I also found out that as long as I removed all the dust and lose dirt, I could polish with Johnson's paste wax and not only would it shine it up, it would clean it at the same time.

When I did the Signal, I was told to use thin coats and to do minimum 6 coats.   When I had done that, I was always nervous I was putting on too much.  I was not sure if I was being even with the amount either across the entire playfield.  If you have not used paste wax, basically you rub a cloth on the paste which comes in a large can similar to a shoe polish can.  I was not sure at all if I had enough or too much and when to add more, etc, etc...

So this time I started to look for more information on best techniques to use.  I found a technique that was listed on two websites were you take a glob of the paste wax and put it in the center of a cloth cut from an old t-shirt.  Grab the corners of the cloth and twist them to form a ball of wax in the center of the cloth.  You then rub the cloth on the furniture and it will ooze out of the material and spread evenly.  I figured I would give it a shot and it was SO much easier.  I wish I had done this last time.

I have done 5 coats of the wax and followed the instructions Arnold gave the Fonz (It was the Fonz that Arnold told to do it, right?).  I waxed on, I waxed off.  I could not be happier with the results. I will do a few more coats and I still need to do the pathway from the plunger but the difference so far is amazing.  I did lose a little of the paint but I had to clean it so really no way to avoid it.  I believe though no more should be lost as it is protected.  There was an option to touch up the paint but I think it would look like crap and fake so chose to let it be what it is...

Is it me though or do these pictures make you think of Gary Payton dishing off to Shawn Kemp for a massive jam?  Maybe it's just me...

Arnold telling the Fonz to wax on, wax off...


Saturday, January 25, 2014

Removing 80 years of build up

I have begun the process of cleaning the metal work on the machine.  When I restored the Signal it had lots of dust and dirt from sitting with no glass in a basement for 40 years. Compared to the Super-8 however it was quite clean. I believe the Super-8 was kept in a barn or shed for many, many years.  It also looks like it was not maintained well in the years it was in use.

The outside ball track was in such bad shape that I started looking for a replacement right away. I did not have any luck finding a replacement so decided to see what I could do with it.  There was a groove down the center which is common on these machines, but this one was very deep, dirty and rough.  The previous owners must have never cleaned or replaced the games balls. The balls would pick up dirt and grind it into the playfield and outside ball track which made it rough. The rough metal would then damage the balls, which would then damage the metal, etc, etc.

You can see here how bad it was when I got it.

Severe damage to outside ball track


I started out with a Dremel and sanded out the groove to smooth it out. Then I followed by using various grades of steel wool.  Lastly I polished it with Brasso.  It now has a brushed look but the groove is gone, it is smooth and will no longer cause more damage.

Track after sanding and polishing


Next I started to clean and polish the metalwork on the playfield itself. I just gave it a bath with dish soap and warm water with a toothbrush and then followed with metal polish. It is amazing how much nicer it looks. There are some stains I cannot remove but still very happy with how it looks for something 80 years old. The metal castings are really beautiful.  I am still in the process of finishing but have some pics of one of the runways done and the other as it was when I got it to show the difference.

I also started to wax the center of the playfield which you can see in the last picture.  I had toyed with clear coating it, but was advised against it and so am just waxing it.

Dirty metalwork


Cleaned and polished metalwork


Runways, one clean and one dirty to show the difference


More to come....


Friday, January 24, 2014

Kind of addicted...

I recently finished restoring my first pinball machine, a 1934 Bally Signal which you can read about here:    http://1934signal.blogspot.com/

It took about 6 to 7 weeks to complete and I enjoyed doing the research, the restoration process and the people I have met along the way.  I was instantly hooked and started looking for another machine to restore before I was even done with the restoration.  I found a few options but the asking prices were too high for the machines I was looking at and so I offered lower, realistic prices for these machines.

While I was in the process of searching for my next pinball project, I continued with my original plan of restoring the few items I saved from my childhood with the hopes of restoring one day.  I had 3 items total, the Bally Signal, a 1975 Sanyo Comet II pachinko machine that my father purchased for us as kids and my first stereo which was also something my father had picked up, a Grundig Majestic.

I have completed the Sanyo pachinko restoration though it is not what I would truly call a restoration as it looks nothing like it did in it's original state.

This is the Sanyo from my childhood before and after restoration:

1975 Sanyo Comet II prior to restoration.


1975 Sanyo Comet II after the restoration.


The Grundig is still in a holding pattern.  It has not been used for listening to music for over 20 years.  It has just held a place as a beautiful piece of furniture in our living room during that time.  Soon I hope to have it play again...

So I still continued to search for my next pinball and one I came across about a month ago was a Stoner Super-8.  I could see in the pictures it was missing a few things and their cost was way too high.  I gave them a price of nearly half what they were asking and was denied.  I said if you don't get what you want to let me know.

While I was waiting I kept searching.  While I was searching I was also searching for additional pachinko machines, was I was hooked their as well.  I had forgotten how much I loved to play pachinko before an Atari was left under the Christmas tree and rocked my world.  While I was searching I had been discussing the pachinko restoration with my older sister and she also loved it as well and I started to think I would like find and restore one for her son for Christmas.  I checked with her what she thought and thought it was a great idea so the search began.  Long story short as this blog is supposed to be about my Super-8, I found a 1976 Okumura Yuki pachinko machine to restore and got right to work. I don't have a great before shot of his machine but here it is as it looks now.

1976 Okumura Yuki


So back to the Super-8.  I once in a while would get a mail with the seller saying he could come down a little and to come and see it.  I told him if he could come down to my price I would.  I was not going to drive out to look at a machine if the cost was not what I was willing to pay.  It would waste both of our time.  About 2 weeks ago he called me again asking if I was still interested in it and I told him again I was but only at my price.  He said it was time to sell it as he obviously was not getting what he was looking for.  So I took a drive to check it out.  Other than the parts I knew were missing already from the pictures, it looked pretty good so I purchased it.  The only issue is that whatever had been living inside it needed to find a new home... ;-)

Below are the pictures of the machine in the condition it arrived in my house minus the animal bedding I cleaned out of the inside.

Super-8 side view


Super-8 playfield


Super-8 close up of the scoring runways

Super-8 artwork

Super -8 - two transformers were inside, both with dry rotted wiring.

Time to get to work! :)